Mobile 3D Pop Out Effect | Photoshop Effect | Photoshop Tutorial
- Deep Shah
- Dec 24, 2019
- 4 min read
Updated: Nov 6, 2022
In this tutorial , you will learn how to create this awesome Mobile 3D Pop Out Effect in Photoshop. Creating this 3D Pop out effect might look a bit difficult but it is not so just follow the steps mentioned below and learn how to create it for yourself . So let's get started!
Download Photoshop :- https://prf.hn/l/OVRDLJm
Equipment I use :-
Primary Laptop :- https://amzn.to/3BLqADZ
Secondary Laptop :- https://amzn.to/3wryYWo
Mouse :- https://amzn.to/3zsnuCH
Mobile Image Download Link :- https://www.pexels.com/photo/close-up-photo-of-mobile-phone-1786433/
Couple Image Download Link :- https://www.pexels.com/photo/couple-on-railroad-258421/
Single Man Image Download Link :- https://www.pexels.com/photo/photo-of-person-walking-on-road-2669155/
Couple Final Image PSD Download Link :- https://drive.google.com/open?id=1Z_zJhv9EC269mBPw6ASSF7_CkYwTEbXo
Single Man Final Image PSD Downlaod Link :- https://drive.google.com/open?id=1xoJxNKfBvfUSR9kglkTP6d6tR5OoqPFI
Youtube Video :-
Ad :-
Steps on how to create this Mobile 3D Pop Out Effect in Photoshop :-
So the first step is to open the Image of mobile held in Hand in Photoshop

Now we need to remove background from here , so for that using Quick selection tool make a selection of Mobile and hand ( Note1 : To deselect a selection press ALT and then click and hover over that area , Note2 : Use square brackets of your keyboard to increase and decrease the size of the brush )

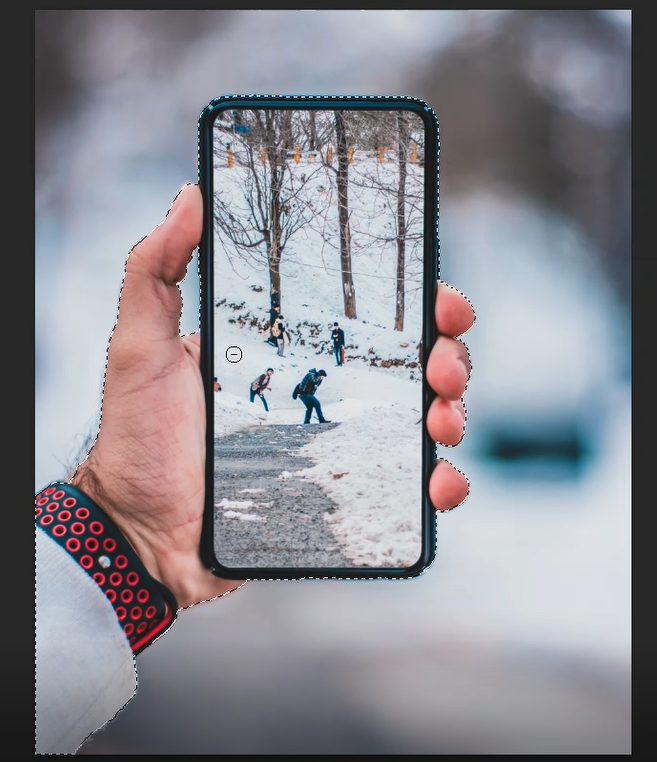
After that click on Add layer mask icon which will only keep selection and remove rest of the Image

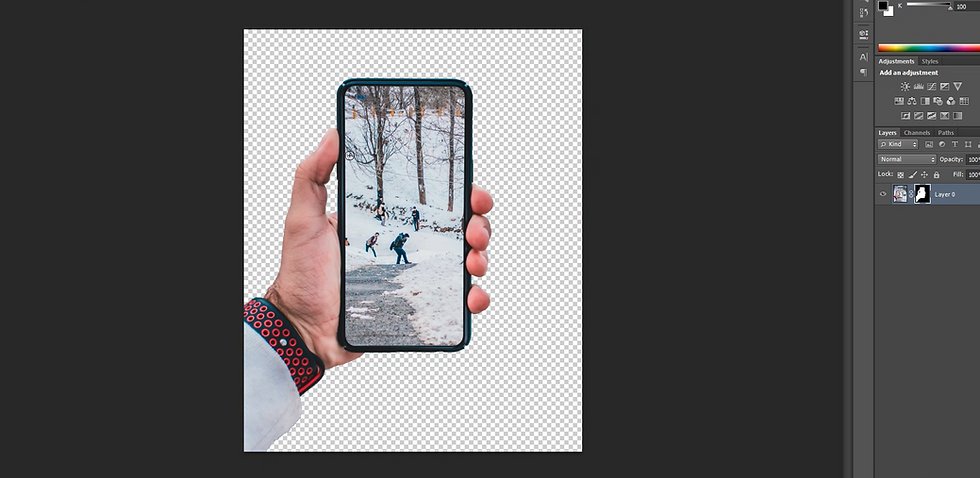
Now we need to remove the image Inside of mobile as well , so for that select Polygon Lasso tool and then using it make the selection around mobile as shown below ( Note : Press Del key of your keyboard to go a point back )


After that make sure that the mask of the mobile layer is active and foreground color is black and then press ALT + Backspace key of your keyboard which will mask the image inside selection

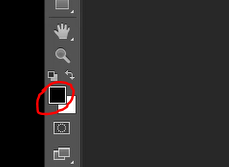

Then press CTRL + D to deselect the selection

Now bring in the image you want to add over here and then click on the tick icon to place it

Then drag this Image's layer below the mobile image layer


After press CTRL + T and then scale and place the image properly and then click on tick icon to place it ( Note : Press SHIFT while scaling to scale evenly)

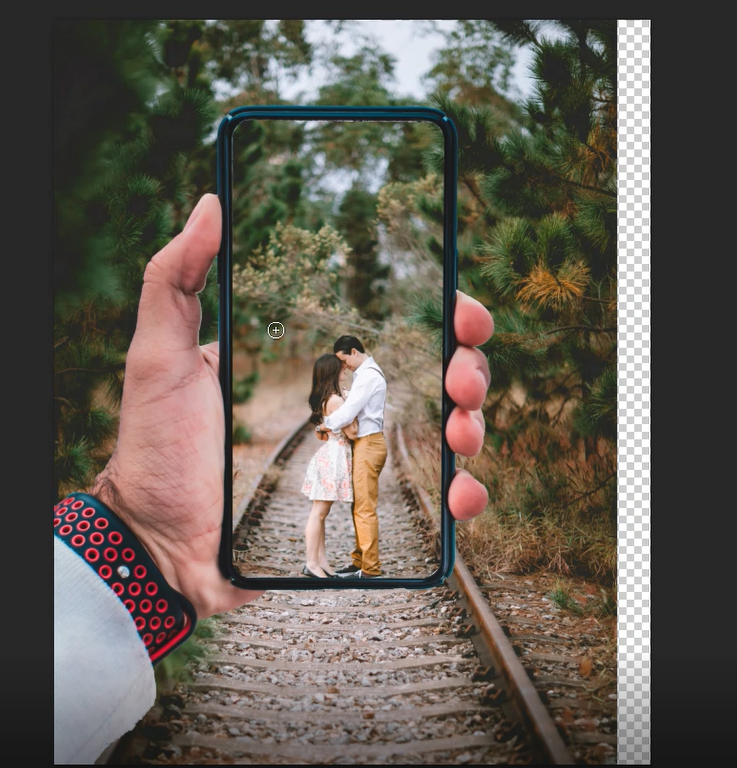
Now make the mobile layer active by clicking on it and then Crop the transparent image using it and then hit enter to crop it


Now over here we just want to keep the image that it inside the mobile and then image that we want to make come out of the mobile , so for that make the model image layer active by clicking on it and then click on Add layer mask icon


Then using Polygon lasso tool make the select of the mobile and then part of the image that we want to make pop out of mobile as shown below

After that press CTRL + SHIFT + I to invert the selection

Then select brush tool and brush as hard round and then make sure that foreground color is black and then using brush click and hover over selection to remove the image (Note : Use square brackets of your keyboard to increase and decrease the size of the brush)


Then press CTRL + D to deselect the selection

Now we need to remove the lower part of the mobile so that looks like the track is coming out of mobile , so for that make the mobile layer active and then reduce the opacity of the layer to 50 % so that we can make the selection of tracks around hand properly

Then using Polygon lasso tool make the selection of the part of the image that is going to pop out of the mobile which is railway tracks over here

After that make mask of the mobile layer active by clicking on it and then select brush tool and brush as hard round and make sure foreground color is black

Then using brush tool hover inside selection which will remove the lower part of the mobile

Now press CTRL + D to deselect the selection and then increase the opacity of the layer back to 100%

Now we need to fill the image with a background , so either you can fill it with a nice Gradient color or fill it with same image and blur it and I am choosing 2nd option over here , so for that bring in the same over here again

Then scale the image so that mostly greenery part is visible and click on tick icon to place it

Now drag this image layer at the bottom
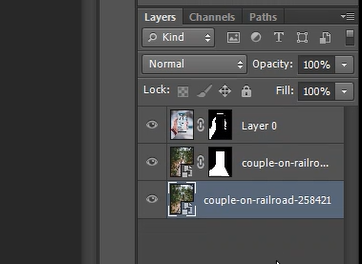

Now go to Filter and then blur and then select Gaussian blur over there and then set the radius accordingly and then click on OK


So this will give you your Mobile 3D pop out effect using Photoshop!
So that's it guys!
Now if you guys liked the tutorial then hit the like button also share it to the ones who might be interested in such videos !
Happy Learning!
Youtube Video :-
Similar Tutorial :-
How to create 3D Pop out Effect in Photoshop :- https://youtu.be/BPEthLHNavU


Comments